Here you are, finally off on your long-awaited cycling holiday where you are ready to put your trusty touring bike to the test.
After the first few kilometres of the trip, however, you discover the not-so-faithful side of your travel bike: the tyre gets punctured and you are not at all prepared for this unexpected event. Great, you’ll think your bike trip is now ruined…
But no… If you’ve ended up on this article, you are most likely looking for how to solve this annoying snag or, being the forward-thinking type, you’re trying to figure out how to avoid and prepare yourself, in case this unpleasant incident might happen along your biking vacation.
Don’t worry, because we, of Bikeit, don’t want your journey to be interrupted by a simple hole in a tire.
Therefore, we have prepared for you an effective, few-step guide, to repair a punctured bicycle inner tube.
The Bicycle Inner Tube Repair Kit
With all due caution, being forewarned before a bike trip can make all the difference.
Carrying the right bicycle inner tube repair kit with you can be the first big step towards not ruining your trip and getting right back on the bike.
But, what should a good repair kit contain and what tools are strictly necessary?
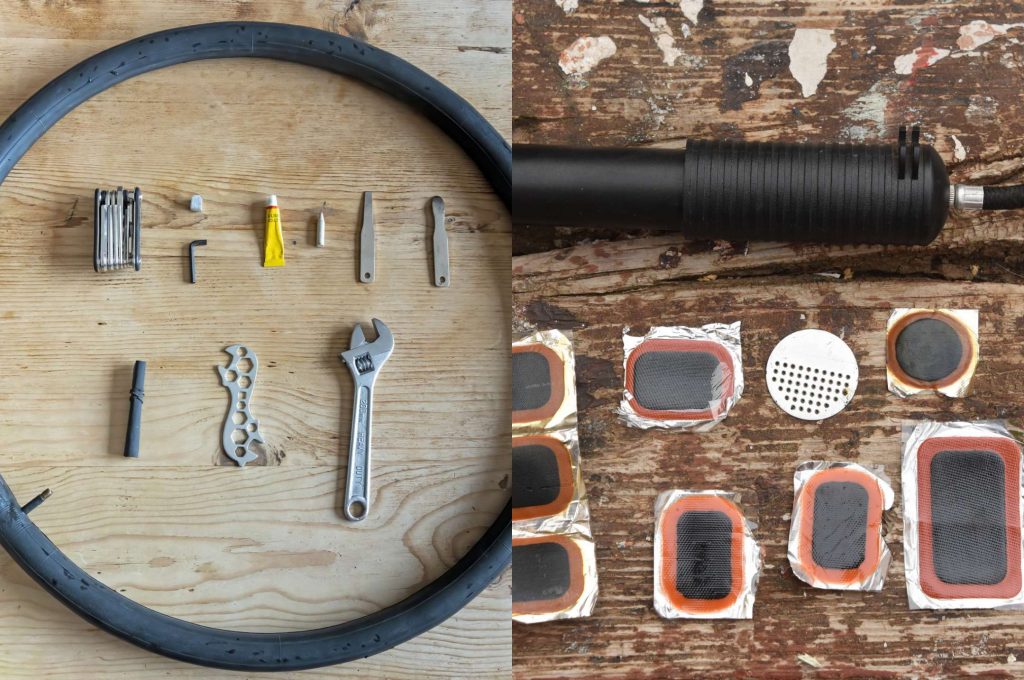
The perfect repair kit can never be lacking:
- A multipurpose spanner kit
- Tyre puller
- A spare inner tube
- Hole patches
- Sandpaper for filing the hole
- Mastic for gluing patches
- A pump for inflating
With such a repair kit, you can really play it safe and not fear any nails along the way.
The tools, however, are not very useful if we are unable to use them for our own purposes. Here, therefore, is the step-by-step guide to repari your flat tire and getting back on the bike in no time.
The repair kit, however, is not the only thing we recommend you bring when you go on a bike trip. Before you keep reading the article, in fact, we also recommend you to read:
“Traveling by bike: the travel kit for your bike trip“.
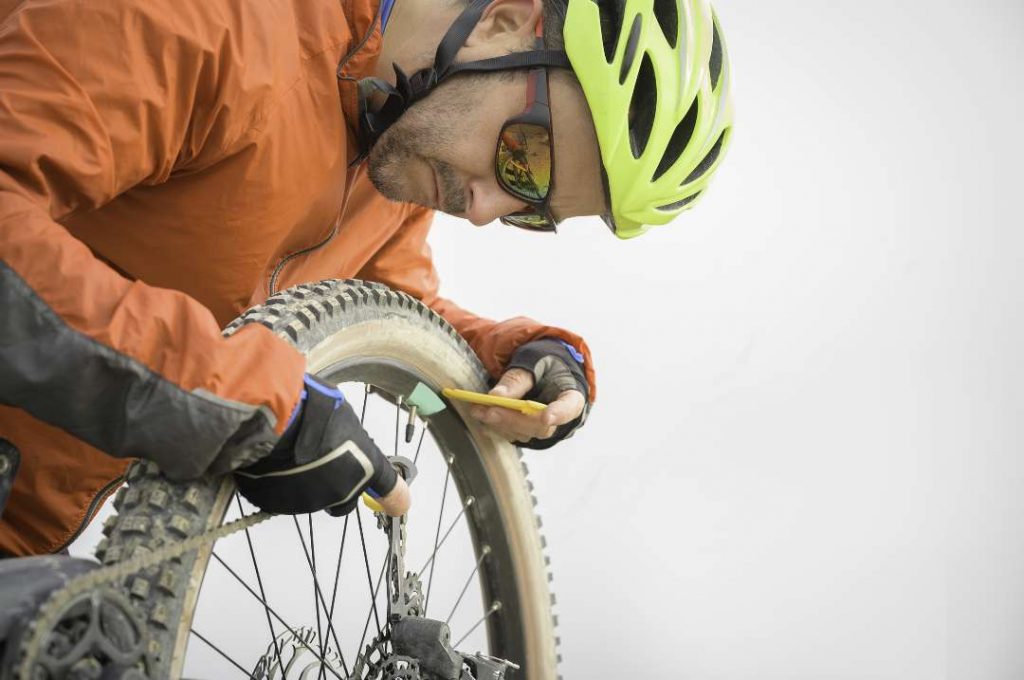
How to fix a flat bicycle wheel? (all steps)
Knowing your bicycle is very useful for prevention. In fact, it is important to recognise problems with your bicycle at an early stage and intervene as soon as possible to prevent seemingly harmless damages to more serious problems with your bike.
If the damage is a simple puncture, do not hesitate in stopping immediately to repair your bicycle inner tube. Riding your bike with punctured or deflated tires can lead to far more serious damages such as broken gears, bent rims, and accidents.
Here, then, are the 12 steps to follow to repair your bike inner tube as soon as possible and start your journey again:
1. Position the chain on the smallest sprocket
It makes the manoeuvre of removing and re-inserting the wheel much easier. Please note that this will not be necessary if the hole is on the front wheel, as it has no sprocket.
2. Release the brake
Release the brake cable and then pull the brake pads away from the rim to prevent the tyre from touching the brake pads during wheel removal. If you have disc brakes, this will not be necessary.
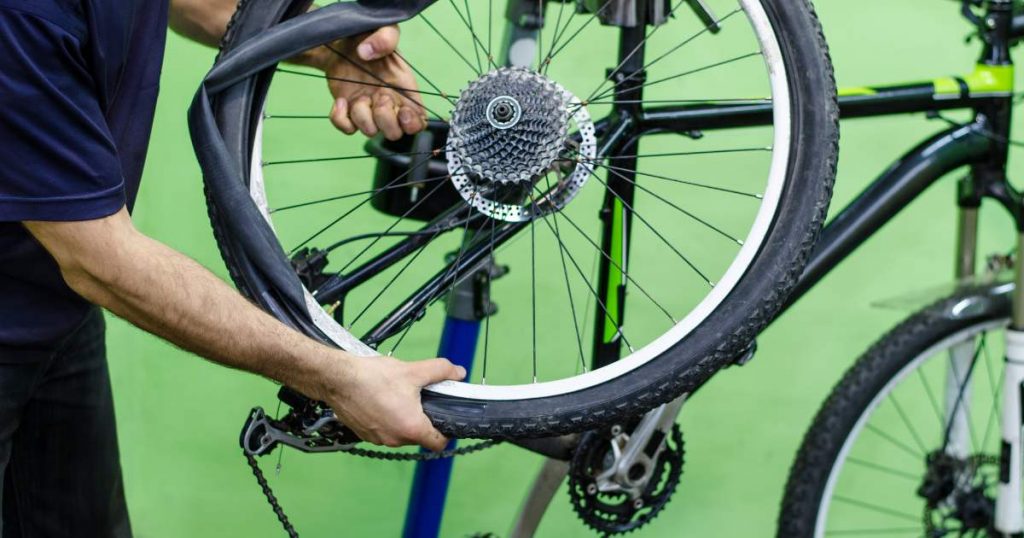
3. Remove the bike wheel from the frame and slide it off
In order to be able to remove the wheel, it is first necessary to release the quick release that secures it to the frame, or, if there is a bolt, it must be unscrewed with the right size spanner from the multi-purpose kit. It will now be possible to remove the wheel. Be careful when manoeuvring because it can happen that you bend the gearbox or break the chain. Please note that this is not necessary if the puncture is in the front wheel which is without a sprocket.
4. Pull out the tyre with a tyre driver and remove the valve washer
The special valve deflates the wheel completely. Now it is time to use the extractors to pull the tyre off the rim, but only on one side. Then proceed to unscrew the washer that holds the inflation valve in place and keep it aside.
5. Remove the inner tube from the bike and find the hole
Remove the inner tube from its seat by pulling it out and pulling it out completely. Then use the pump to inflate the perforated inner tube so that the exact point of the hole is intercepted.
6. Remove the entity that caused the puncture (pins, nails, glass, etc.).
Once the hole is found, it is time to check the nature of the damage and whether there are any foreign bodies such as nails, staples, pins, glass, etc. Be sure to remove all foreign bodies or any residue that may remain lodged in the tyre, as it is not unlikely that they could be the cause of a further, future mishap.
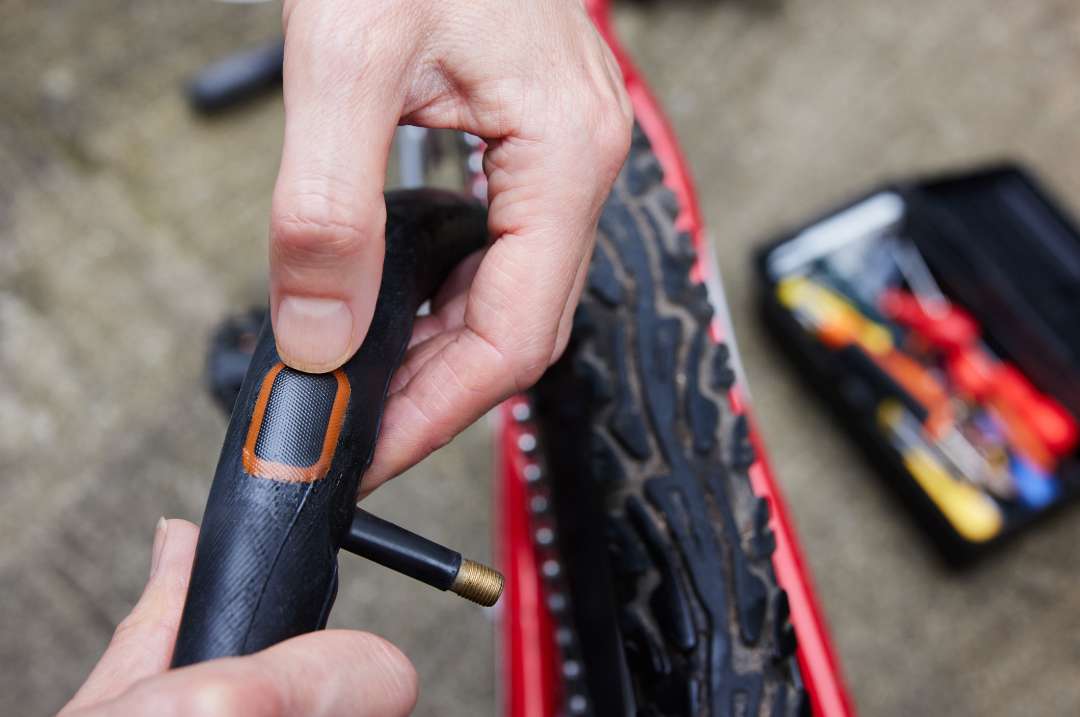
7. Scrape out the drill hole and apply putty
So once the hole has been identified, it is time to repair the inner tube of the bicycle. Rub the hole and surrounding area with sandpaper to roughen the surface so that the putty can take more hold. At this point you can apply the putty, make sure you spread it over a larger area than the patch to be applied. We recommend that you spread it well and do not touch it, to avoid reducing its effectiveness. Wait until the putty is dry.
8. Apply the patch
Now simply put the patch on and press firmly onto the inner tube, making sure to seal the edges of the patch well in particular. Then proceed to remove the transparent film, checking that the patch remains attached to the inner tube.
9. Replace the inner tube in its place
Inflate the inner tube slightly so that it is then easier to reposition it inside the tyre. Please remember to first insert the inflation valve into its seat and screw the washer onto the valve.
10. Re-insert tyre and inflate wheel
Proceed to reinsert the tyre into its seat inside the rim and then fully inflate the inner tube with the pump.
11. Reassemble and secure the wheel
It is time to put the wheel in place. Pay attention to the sprocket, chain position and that the wheel is well centred. Finally, tighten the quick release or bolt.
12. Reassemble the brake and do a test run
And don’t forget to refix the brake cable. To be on the safe side, take a short test ride and, if everything is tested, you’re ready to get back in the saddle!
Changing the bicycle inner tube completely
In cases where the hole is too big to repair or you simply have a new inner tube in your kit, it will be very easy to replace the punctured inner tube with a new one.
Simply follow the instructions up to step 5, i.e. the removal of the punctured inner tube, and then continue to step 9 for the repositioning of the new inner tube and the reassembly of the wheel.
You will see that, in no time, you will be back on your bike seat.
If you are still not very sure on how to change your bike inner tube, also try watching this video on YouTube: “How to change your bike inner tube“.
Repairing a bicycle inner tube: explanatory video
Are you still having trouble with the puncture repair? To better understand the process, watch also this video on YouTube:
“How to repair inner tube with patch“.
You don’t want any problems on your bike journey? (travel insurance with Bikeit)
Along the way, unexpected events can always happen, but with Bikeit you don’t have to worry.
While purchasing your biking vacation you also have the option to add insurance. Just select it at the purchase stage and enjoy your cycling adventure.
In case of punctures or damage, Bikeit will take care of getting you back on your bike as soon as possible. Let’s keep our fingers crossed of course and hope none of these unforeseen events happen!
What are you waiting for? Book now your next bike trip on Bikeit and you will see that you will not regret it.